Scenery
How do you ballast model railroad track without gluing a turnout solid?
Quick answer
The safest way to ballast model railroad track is to spread it dry, shape it with a soft brush, wet it with a water and dish soap mist, then drip diluted adhesive in with a pipette, keeping every drop away from turnout throwbars and point rails, where a stuck turnout usually costs more time to fix than the turnout is worth.
Ballast is doing three jobs at once: filling the gap between the rail and the layout surface, keying the track down so a bumped table does not shift it, and reading as gravel or crushed stone rather than as plastic tie strips on bare plywood. That last job is entirely about grade. Medium ballast looks right under HO rail. The same bag poured under N scale track reads as a bed of cobblestones, and ballast sized for O gauge looks like boulders under either smaller scale.
The sequence matters as much as the material. Ballast goes down dry first and gets shaped with a brush before any liquid touches it. Water goes on before the adhesive, not mixed into it. And the one place ballast causes real, expensive damage is not a badly shaped shoulder, it is glue that wicks into a turnout's moving parts and welds the points to the frog. Everything below is built around avoiding that single mistake.
On this page
What ballast grade actually matches your scale?
Ballast grade is sized to the scale running over it, not to personal preference, and a mismatch is one of the few scenery errors that reads as wrong even to someone who has never built a layout. The full breakdown, with more grades and colors, is on the ballast grade chart.
Fine ballast suits N scale, medium suits HO, and coarse suits O; putting coarse ballast under HO track makes the roadbed look like a bed of boulders.
| Scale | Recommended grade | Why | Shop |
|---|---|---|---|
| N | Fine | N scale ties and rail are small enough that anything coarser reads oversized | Woodland Scenics Fine Ballast Shaker Gray 50 cubic inches |
| HO | Medium | Proportioned to HO tie spacing and rail height, the most forgiving grade on the shelf | Woodland Scenics Medium Ballast Shaker Gray 50 cubic inches |
| O | Coarse | O gauge track is large enough to carry visibly bigger stone without looking wrong | Woodland Scenics B89 Coarse Ballast Bag Gray 18 cubic inches |
Color matters less than grade but still reads: gray and buff like Woodland Scenics Fine Ballast Shaker Buff 57.7 cubic inches suit clean modern mainlines, while a weathered brown like Woodland Scenics Brown Ballast 32 oz Shaker suits branch lines and older eras.
How do you ballast track step by step?
- Match the ballast grade to the scale. Buy fine ballast for N, medium for HO and coarse for O, and treat it as a hard rule rather than a preference. The wrong grade is the one scenery mistake a non-modeler notices immediately, because coarse ballast under HO track looks like a bed of boulders and fine ballast under O gauge disappears into the roadbed.
- Spread the ballast dry. Pour it dry along the centerline and shoulders before any liquid touches it, working a manageable section of track at a time so nothing dries out before it is shaped.
- Shape it with a soft brush. Use a soft handled brush to sweep ballast off the tie tops and rail webs and taper the shoulder down to the layout surface. Shaping happens now, while it is dry, because glued ballast cannot be moved without leaving a visible scar.
- Wet the ballast before any adhesive touches it. Mist the shaped ballast with water carrying a drop of dish soap, or with a diluted isopropyl alcohol spray, until it is fully saturated. Skip this step and the adhesive beads up on the surface tension of dry stone, dragging ballast into clumps instead of soaking in evenly.
- Apply diluted adhesive with a pipette. Drip diluted white glue, or a ready mixed product like Woodland Scenics Scenic Cement 16 oz, along the shoulders and between the rails with a pipette rather than pouring it from the bottle. Pre-wetted ballast pulls the adhesive down through itself by capillary action, which is the entire reason wetting comes before gluing.
- Keep every drop away from turnout throwbars and point rails. Work turnouts last and use noticeably less adhesive than instinct suggests. Glue that wicks into a throwbar or under a point rail usually costs more time to clean out, with the turnout pulled from the layout, than the turnout is worth replacing.
- Let it cure fully before running anything. Leave the ballast undisturbed for a full day before test running a train over it, longer before ballasting the next section. Adhesive that looks dry on the surface can still be soft underneath, and a locomotive run too soon will push ballast out of shape.
Should the ballast around a turnout look different from the rest of the track?
No, and that is exactly why the point above works. A turnout ballasted everywhere except the throwbar and the point rails looks identical to a fully ballasted one from the aisle, because the unballasted patch is small, low and already shadowed by the points themselves. Full ballasting through a working turnout is possible, done carefully with an acid brush and tiny drops of adhesive kept a scale foot back from any moving part, but it adds real risk of a stalled or shorted turnout for a cosmetic gain nobody standing at normal viewing distance will register.
If a turnout does stall or short after ballasting, suspect glue in the mechanism before anything electrical. A drop that wicked under a point rail can hold it just off the stock rail, enough to lose contact without being visible.
Why did the ballast bead up or turn cloudy instead of soaking in?
Beading almost always means the wetting step was skipped or was too light. Water with nothing to break its surface tension sits on top of dry ballast in droplets rather than soaking through, and diluted adhesive dripped onto a bead of water does the same thing, dragging loose stones into a clump instead of gluing them in place. Go back over the area with a proper wetting mist before adding more adhesive.
Cloudiness after drying is usually a dilution or thickness problem rather than a product fault. Plain white glue and products like Woodland Scenics Scenic Cement 16 oz dry clear when spread thin and given a full day, but a thick pool left where two applications overlapped can dry with a milky finish. Thin the mix a little more and apply in a slightly wider, shallower area rather than compensating with more adhesive.
What do you actually need to buy?
A small shaker or bag of the right grade, a bottle of adhesive, and a pipette cover almost every layout. Buy more ballast than the estimate suggests, since color runs are sometimes discontinued and matching a shade later is harder than buying extra now.
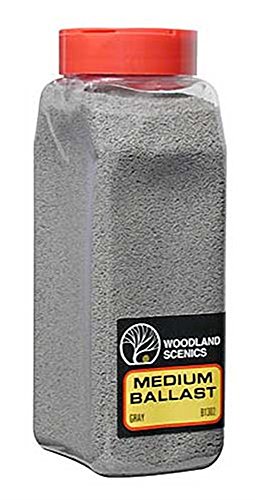
Woodland Scenics Medium Ballast Shaker Gray 50 cubic inches
$19.90Medium grade and a neutral gray that suits a generic modern or transition era mainline.
Best for: HO scale main line and yard track
Check price on Amazon
Woodland Scenics Scenic Cement 16 oz
$14.26Formulated to dry clear and matte rather than glossy, and dilutes further with water if it runs too thick.
Best for: Anyone who does not want to mix white glue by eye
Check price on Amazon
Woodland Scenics Fine Ballast Shaker Gray 50 cubic inches
$19.37Fine grade proportioned to N scale tie spacing.
Best for: N scale layouts
Check price on Amazon
Woodland Scenics B89 Coarse Ballast Bag Gray 18 cubic inches
$11.78Coarse grade that reads correctly under the larger ties and rail of O gauge track.
Best for: O gauge layouts
Check price on AmazonHow we chose
We did not test these products in person and we never claim to. Picks are researched from manufacturer specification sheets and instruction manuals, published NMRA standards and recommended practices, and the recurring themes in verified owner reviews. Every pick is matched to a real scale, a real minimum radius or a real current draw rather than to a price bracket, and it is placed in the tier where its capability actually belongs. Where a product is wrong for most layouts we say so on the page, and where a figure is a hobby rule of thumb rather than a published standard we say that too.
Sources
- Woodland Scenics published ballast grade and application instructions
- Manufacturer turnout maintenance and wiring guidance
Frequently asked questions
What ballast grade should I use for HO scale track?
Medium grade ballast, sold by every major scenery brand specifically for HO. Fine ballast, sized for N scale, looks slightly undersized under HO rail, and coarse ballast, sized for O gauge, looks oversized to the point of resembling loose rock rather than crushed stone.
Can I use the same ballast bag for N scale and O gauge?
Not without it looking wrong under one of them. Grade is tied to scale because the ballast stone has to look proportioned to the ties and rail sitting on it. Buy fine for N, medium for HO and coarse for O rather than trying to make one bag do all three.
Why did my ballast adhesive bead up instead of soaking in?
The ballast almost certainly went from dry straight to glue without a wetting step in between. Water alone, or diluted adhesive, has enough surface tension to sit on top of dry stone and drag it into clumps. Mist the area with water carrying a drop of dish soap first, then apply adhesive once it is fully saturated.
How do I keep glue out of a turnout while ballasting around it?
Ballast the turnout last, use less adhesive than instinct suggests, and consider leaving the throwbar and point rails unballasted entirely. That gap is invisible at normal viewing distance, and it removes the single most common cause of a turnout that stops working after a scenery session.
How long should ballast dry before running trains over it?
A full day at minimum, and longer in humid conditions or over a thick application. Adhesive can look dry on the surface while still soft underneath, and a locomotive run too early will push wet ballast out of its shaped profile.
Can I ballast over track that was already ballasted and glued years ago?
Yes. Add new dry ballast to fill gaps or replace a discolored patch, shape it with a brush against the existing profile, then wet and glue it the same way as a first application. It blends better if the new ballast is the same brand and grade as what is already down.
Researched, not professional advice. This page is compiled from published manufacturer specifications, instruction manuals, published NMRA standards and recommended practices, and owner-review consensus, not hands-on testing. Figures described as a rule of thumb are hobby convention rather than a standard, and they are labelled that way wherever they appear. Always check a radius, a clearance or a grade against your own equipment before you cut wood or lay rail, because manufacturers vary and so does what your specific models will tolerate. Any permanent mains wiring in a layout room is work for a licensed electrician to your local code.